Saturday, August 2, 2014

Can I be a [gluten-free] foodie?


Can I be a [gluten-free] foodie?
the crossroads where diet meets desire

If you do a quick Google search of the term "foodie," you will immediately be greeted by these definitions:
  • (n.) a person with a particular interest in food; a gourmet (Google.com)
  • (n.) a douchebag who likes food (UrbanDictionary.com)
  • (n.) a gourmet, or a person who has an ardent or refined interest in food and alcoholic beverages (Wikipedia.com)

At first glance, the idea seems fairly straightforward: foodies like food. Therefore, being a foodie shouldn't involve much more than an appetite and a desire to try something new. As you explore the concept, however, things start to get a little more complicated. The Wikipedia entry on foodies, for example, goes on to say, "Typical foodie interests and activities include the food industry, wineries and wine tasting, breweries and beer sampling, food science, following restaurant openings and closings and occasionally reopenings, food distribution, food fads, health and nutrition, cooking classes, culinary tourism, and restaurant management." Wowza. That is quite the list of interestes, and some of it seems a bit exclusionary--at least, for me. 

I mean, can you be a foodie if you say no to every wine list, reject every plate of fromage (that's cheese for you non-foodie types), and shudder at the thought of biting into a flaky French pastry, colon-damaging gluten oozing from every pore? I'm Mormon and therefore a teetotaler, lactose intolerant to the point that too much milk chocolate gets me gassy, and a celiac. When you eliminate alcohol, dairy, and gluten, what is there left for a gourmet to enjoy?

Plenty, I tell you:

  • Scouring the internet (Okay--Pinterest) for delicious, yet approachable, recipes that meet my dietary requirements
  • Inventing new non-alcoholic beverages, like Obsessions (Sprite, non-dairy ice cream & orange juice) & taste-testing every variety of non-alcoholic sparkling cider
  • Sharing the joy of a newly-discovered, celiac-friendly restaurant with my family and friends (especially those who are also gluten-free)
  • Discovering new gluten-free products--baking mixes, flour blends, pastas, whole-grain cereals, sausages, granola bars, GoPicnic lunches--You name it, I've gotten excited about finding a gluten-free version of it!
  • Tweaking recipes and simple meals to add my own flair and an extra dash of flavor
  • Enjoying the many foods I actually can eat (and it is more than you might think)
    • Hummus 
    • Fresh fruits and vegetables in all their varieties (I could list my favorites all day)
    • Smoothies 
    • Indian food 
    • Homemade coconut ice cream 
    • Dark chocolate 
    • Steak
    • Rice
    • Potatoes
    • All-fruit popsicles
    • Coconut
    • Herbs & spices
    • Garlic
    • Quinoa & other gluten-free grains
    • Eggs
    • And many more!
  • And, and what else?
Okay, so maybe my list looks a little measly compared to what you might find on the pages of Food & Wine, and I may not be able to enjoy every dish that calls to me from the latest cookbook or food blog. But I enjoy eating. I enjoy trying new things. Food and I, we're good friends. Isn't that enough to make me a foodie?

Well, I want to say yes, but the truth is--probably not. Food allergies and an aversion to alcohol don't have to be obstacles on the road to foodie heaven. In fact, G-Free Foodie is dedicated to that very concept (well, at least the gluten-free side of things). They have recipes, a restaurant guide, a shop, and most interestingly--a program called G-Free Foodie Box Club that delivers "a curated collection of the most delectable artisan foods" straight to your door (for a fee, of course). So, yes, being gluten-free AND a foodie is POSSIBLE; however, MY enjoyment of eating and trying new things is not quite enough to classify me (personally) as a foodie--at least, not yet.

While I love food, I don't exactly love cooking. Sometimes it's the idea of shopping for unfamiliar ingredients that leaves a sour taste in my mouth. Other times it's a lack of confidence in my cooking skills or culinary knowledge that makes me wilt before a challenging recipe. And if I'm being totally honest, I have some form of culinary ADD. Frankly speaking, if a recipe has more than about eight ingredients in it, I'm probably going to skip it, especially if those ingredients include things like xanthan or guar gum (vegetables, fruits, and spices, on the other hand, are another story). Combine these weaknesses with the secret ingredient of my mother's natural prowess in the kitchen (she is most definitely a foodie), and you wind up with a "kitchen intimidation" reduction that allows me to pin dozens of beautiful recipes while only sampling a handful in real life.

More often than not, however, it is simply a matter of time that keeps me out of the kitchen--as in, cooking requires time, and I don't have it, or cooking requires time, and I don't want to give it. Typically, I only think about preparing food when I'm hungry and, therefore, impatient. As in, ten minutes is a sizable amount of time to wait before the meal is on the table. Anything more than that would be unbearable. Peruse my "To-Dones" Pinterest board and you'll find that most of the recipes I have tried are simple, contain few ingredients, and are perfect for beginners. Sure, there may be an exception or two, but certainly not enough to hide a clear bias towards the more streamlined recipes of life.

Now, does any of that sound like a foodie?

Yeah, I thought you would agree with me. I'm not there yet, but I'm learning. Blogging encourages me to experiment (otherwise I have no new content), and successful experiments have built my confidence (at least a little). As I collect more and more would-be recipe options on Pinterest, my natural urge to scratch items off my to-do list starts to itch, and through experimentation, I've learned that I might have inherited a little more of my mother's food instincts than I first imagined. I used to think she was crazy for improvising measurements as she goes; now I frequently find myself doing the very same thing. The more I get out of my own way, the more I believe in my ability to improve--and that goes for more than just making food.

This blog is about offering resources, recipes, and reassurance, so let me reassure you: You can do this. If you want to be a gluten-free foodie, do it. Seek out "delectable artisan [gluten-free] foods," meet like-minded people, try those recipes that please your palate, meet your dietary needs, and challenge your kitchen's status quo. However, if you're like me, and sometimes put "get'r done" over "gourmet," know that's okay, too. Food allergies may limit our diet, but they don't have to reduce our enjoyment of food.

So, what do you say: Are YOU a gluten-free foodie?

Wednesday, July 23, 2014

Clean Eating Coconut Blueberry Quinoa with Lime Recipe Review


Clean Eating Coconut Blueberry Lime Quinoa
a mouthful, yes, but a fairly yummy one


This recipe comes from one of my favorite food blogs: The Gracious Pantry. Tiffany's site was one of the first blogs I started following, and her posts always inspire me to experiment, use fresh ingredients, and never let my kitchen intimidate me. Her writing style is very friendly, her recipes are always straightforward, and because she is always trying something new, you are bound to find something you'll like. While she isn't strictly speaking gluten-free, many of her recipes are or can easily be adapted to become gluten-free. In a nutshell--go check out this site!

Now, on to the recipe. Tiffany originally described this as a "breakfast 'salad'" created out of her desire to mix things up in the AM (like I said, she's always experimenting), but it could probably work as an afternoon snack or possibly even a side dish for a summer barbecue. Quinoa seems to be all the rage now, so that makes this recipe both tasty AND trendy--a combination sure to impress your guests, whether they are gluten-free or not!

The basic recipe is fairly simple, and preparing the quinoa is the only cooking required, so it comes together in a few minutes. If you don't like one of the original ingredients, you can easily swap them out for something you prefer. If you think of this recipe as an inspiration piece, it can open up a whole world of other options, using quinoa and fresh fruit as the base.

The ingredients
  • cooked quinoa
  • light coconut milk
  • fresh lime juice
  • fresh blueberries
  • honey
A few notes
  1. The lime juice was a little strong for me, so consider reducing the amount or substituting a different juice. I think lemon juice would pair nicely with the blueberries.
  2. I used a small handful of shredded coconut and sliced almonds more or less as a garnish. It was a nice finishing touch, and added a nice taste boost as well.
How would you customize this dish to suit your taste buds?

Saturday, July 12, 2014

Gluten-Free Shopping at Costco

OLD RELIABLES

Gluten-Free Shopping at Costco

You'll be surprised what you find.

If you are like me, shopping for gluten-free groceries can be frustrating. Yes, I know I can pop over to the closest health food store and probably find a host of options, but the price tags are often hefty as well. To get around this, I scour ordinary grocery stores for products that just happen to be labeled gluten-free but aren't marketed specifically to the gluten-free consumer. Surprisingly, Costco has become one of my favorite places to do so.

First, some tips if you decide to go:

  1. Plan to be there awhile and do a lot of walking. Costco's products change frequently, so I go up and down the aisles, eyes peeled for new items. You'll be amazed at what products you might have missed.
  2. Look for the right labels. Obviously, you should take a second look at anything that interests you with a gluten-free label. However, spotting phrases like "all natural," "non GMO," "Kosher," etc. can often lead you in the right direction. Companies that advertise these qualities are more likely to include a gluten-free label for appropriate products, and they may be less likely to add unnecessary gluten-containing fillers.
  3. Try new things. If you think you'll like a product, go ahead and buy it. Yes, you may waste a small amount of money on some mediocre food, but you may also find something you love!
  4. Stock up. As I said above, Costco's products change frequently, and this is especially true with some of the small-market items seen below. Check the expiration dates on products you enjoy and consider whether or not they can be frozen. If they have a long shelf life and or you've got room in your freezer, cram that cart, baby!

Second, a glimpse at the gluten-free products you might find:


I know that, ideally, these lists would include specific information about the price and quantity of each product. Sadly, I just didn't have the patience for that...plus I threw the receipts away months ago. However, I'll try to be more diligent in the future!


Shopping trip #1

From left to right:
  • Welch's Fruit Snacks
  • Kirkland Turkey Breast lunch meat
  • Kirkland Kettle Brand Krinkle Cut Potato Chips: Sea Salt 
    • These are thickly cut, so they're a little hard & extra crunchy--not my favorite buy.
  • Mrs. May's Naturals Trio Variety fruit, nut, & seed bars  
  • Clif Kid Organic Z Fruit Rope
  • Mariani Premium Sliced Almonds
  • Crunchmaster Multi-Seed Crackers: Five Seed
  • Tru Roots Organic Quinoa
  • Burgers by Amylu Sweet Caramelized Onion Chicken Burgers (10 ct. 1/4 lb patties)
    • These come individually wrapped & fully cooked. You can even MICROWAVE them, and they are absolutely delicious, even if eaten alone. I found them in the specialty section in front of the butcher section, and they are one of my favorite products. Buy them if you can! 
  • Late July Organic Sea Salt by the Sea Shore Multigrain Snack Chips
  • Ocean Spray Craisins
  • Nature Path Envirokidz Corn Puffs Gorilla Munch Cereal
  • Eat Pastry Gluten-Free Cookie Dough
    • Do not judge this cookie dough by it's uncooked taste, because it makes a great cookie. I found it in the frozen section, and we buy it every trip. If you have a sweet tooth and no time to bake, keep this in your freezer to crush that fresh-from-the-oven craving!
  • Nature's Path Gluten Free Trail Mixer Granola Bars
  • Peggy's Premium Edamame
    • Edamame is a healthy, protein-packed snack. While it is not labeled gluten-free, it literally has just one ingredient--Non GMO premium soybeans. Pop one of the packs in the microwave, nuke for 3 minutes, sprinkle with sea salt, and enjoy! Just remember the pod is inedible (too tough), so you'll need to pop the beans out to eat them--my husband learned this the hard way. Oops!


Shopping trip #2

From left to right (new items only):
  • Kirkland Beef Hot Dogs
  • GoPicnic boxed lunches (read more about them here)
  • Amira Premium Basmati Rice (20 lbs.--about half the price of Wal-Mart!)
  • Sweet Baby Ray's Barbecue Sauce 
    • This is the only barbecue sauce my father-in-law buys, gluten-free or otherwise. Delicious!
  • Lea & Perrins Original Worcestershire Sauce
  • Plus a few of the same great finds from trip #1!


Shopping trip #3

From left to right (new items only):
  • Aidells Chicken & Apple Sausage
  • All Natural Coconut Macaroons
    • Macaroons are like a chewy coconut cookie--heavy on the coconut and heavy on the egg. I have yet to find a brand that is not gluten-free, and they are Kosher, so you may find them stocked with traditional Hebrew foods at your regular supermarket, especially during Passover.
  • Lara Bar Fruit & Nut Bar Three-Flavor Variety Pack
    • Lara Bars are another great protein-filled snack option. Most health food stores sell them individually for a little more than a dollar a piece, and they come in dozens of flavors, all of which are gluten-free (to my knowledge). If you don't like the first one you try, there may be another one that you love!
  • Sabra Hummus Individual Packs
    • I found this product in the salsa, salads, etc. case located next to the cold produce section. Each individual pack holds roughly one serving, so I can easily enjoy hummus and crackers on the go. I usually pair this with the Crunchmaster crackers seen above.
  • Food Should Taste Good Sea Salt Brown Rice Crackers
  • Meatballs by Amylu Kickin' Cranberry Chicken Meatballs
    • My husband and I loved these for a quick meal. They are precooked, so they just need to be reheated. We like to drizzle them with honey for a special twist. They are just a little spicy (hence "Kickin'"), so they may not be the best choice for kiddos--I stopped trying when my son said, "They hurt my mouth." Oops, again!
  • And, of course, more of those gems from trips #1 & #2!

Finally, a resource for putting your Costco groceries to good use:


I recently started following Amy of A Little Nosh's Pinterest board "The Best of Pinterest," and found this pin:

Source: 5DollarDinners.com

The post provides recipes, a grocery list, and how much everything costs--basically all of the stuff I didn't provide here! If you are feeding a large gluten-free family and or are on a budget, it could be a great resource.

Friday, July 11, 2014

The blog lives on!

So, I came to an important decision today: I want to keep blogging. Shocking, right? Well, I am about halfway through my summer vacation, and last year that was my most productive time. This year, I haven't really felt it, and I haven't posted to this blog even once since September--even though I typically spend hours a day hanging out on my laptop. I knew I needed motivation to get posting again, but I wasn't sure exactly what would inspire me. Well, it wound up being, appropriately enough, some wise words by other bloggers.

First, I read "7 Ways You're Making Blogging Harder Than It Has To Be" by Tay at The Daily Tay. The information was helpful, the post was not in the least bit preachy, and a beautifully styled picture accompanied it. Next, I read "A Post Without Pictures" by Gabbi at Retro Ranch Reno. Gabbi's post was more about her personal experience, but, basically, it told me that it was okay that I haven't posted in 1, 2...9 months (Eek!). This is my slice of the blogosphere, and I get to jump back in (or ease myself out) whenever I feel like it. Finally, at some point during this process, I finally took the plunge and switched back to a Blogger profile and removed the Google+ comment format at the recommendation of Linda at Calling It Home. Additionally, I decided to nix the fancy titles for my weekly features...at least, for now. Now that all of that is done, I'm ready to start blogging...again!

Saturday, September 7, 2013

Cauliflower Crust Pizza Recipe Review


Cauliflower Crust Pizza Recipe Review
Gluten-free, grain-free, and delicious!


Guess what? I am still writing this blog! I know it has been a few weeks since I had any new posts, but school started back up about a month ago, so I have been very busy. While I probably should be preparing grammar bell work for the coming week, I thought it wouldn't hurt to take a brief time-out to share this awesome recipe my husband and I tried tonight.

The ingredients:
  • grated cauliflower
  • plain Greek yogurt
  • eggs
  • Italian seasoning
  • sea salt
  • pizza sauce
  • mozzarella
  • pizza toppings
And a few of my thoughts: 

  1. This dish is perfect for the South Beach diet. My husband has been on Stage 1 for the past few months (against my better judgement), and he loved the opportunity to enjoy some guilt-free pizza.
  2. The crust held together very well, and was easy to pick up and eat (I had my concerns). It is actually quite fluffy.
  3. The recipe says it serves 2, but that's probably only true if you pair it with a salad or other side dish. It makes one roughly 10-inch pizza crust.
  4. I described the crust's taste as "interesting," while my typically more-pedestrian husband said it reminded him of an "artisan pizza" (not sure if has ever tasted one of those). Either way, it's definitely a culinary treat.
Enjoy!

Sunday, July 28, 2013

When Dining Out Gets Dicey

What do you do when a restaurant--literally--serves nothing you can eat?

This has been a very busy, very family-filled week for me, and it included a number of family get-togethers. Fortunately, I love my in-laws, so the social aspect of it was awesome. Unfortunately, Friday night we met at an unfamiliar restaurant that--gasp!--didn't serve anything gluten-free. Ever been in that situation?

After politely asking the server about gluten-free menu items when we first arrived, I received the above information as I headed to the restroom. My response? I smiled brightly, said, "No problem!" and headed to the bathroom...where I did my best not to freak-out, break down in tears, or throw a tantrum. I knew I needed to figure out a solution, but dragging my husband away from his 30-plus extended family members was not an option, nor was politely requesting we move the whole crowd to another restaurant. (It was a surprise party, after all.) Instead, I sent a text to my husband explaining my dilemma (to avoid an emotional outburst), demanded he read the text when I got back to the table (sweetly, of course), and stewed for a bit while he came up with a plan.

After I snapped at him once or twice, my husband suggested we get permission from the manager to bring in outside food and--knowing how petulant I get in these situations--called the server over to make the request. When he came back with said permission granted, I think our server looked more relieved than me! After--again--calling on my husband to locate the closest Wendy's, I took a 15-20 minute round trip to purchase a nice, safe, tasty meal: a plain baked potato and a small chili. To appease my self-pity and brighten my mood, I also swung into a local "farmer's market" grocery store (Sprout's) and purchased four delicious, gluten-free cupcakes with amazing vanilla frosting. (Did I mention this was actually a surprise birthday party, and everyone would soon be enjoying slices of delicious, gluten-filled, chocolate sheet cake?) At the last minute, I also threw in a copy of my favorite magazine (Real Simple) because, you know, I "deserved" it.

When I got back to the restaurant, my family was just getting their food, my husband had a Sprite waiting for me, and no one thought twice about me eating something different...except my son, who kept begging for one of my cupcakes, which I flatly denied him. (He is not gluten-free and later ate two large pieces of chocolate cake--so don't feel too sorry for him.) I could have handled this situation a lot of ways, but I am glad I put my big-girl pants on and found a way to get what I needed without ruining the party for everyone else.

The take-away? Never be afraid to ask for what you need--even if that means eating Wendy's food in the middle of a sit-down Mexican restaurant. Your family--and your digestive system--will thank you for it.

Looking for more tips on gluten-free dining? 
Check out my wining & dining page for a list of tips, restaurants to try, and places to avoid!

Monday, July 22, 2013

Delicious Gluten-Free Apple Crisp


Delicious Gluten-Free Apple Crisp
a dessert baked with love

My mother is the type of woman who believes in making things from scratch and that everyone should have a delicious dessert at Thanksgiving. When I finally committed to a 100% gluten-free diet, this became a bit of a challenge, at least as far as I concerned. Although I was happy with apples baked in cinnamon and sugar, store-bought gluten-free apple pies, and gluten-free brownies from Betty Crocker's delicious mix, my mom wasn't satisfied until she came up with this delicious treat. It's so good, even the glutenites* at your table will dig in!

*Yes, I am working really hard to coin this phrase, but doesn't "glutenite" roll off the tongue so much better than "people who can eat gluten" or "people who are not gluten-free?"

(Scroll down for complete recipe)


Delicious Gluten-Free Apple Crisp
Yields: one 8x8 pan
Hands on time: 30-45 minutes (includes peeling, slicing and paring the apples)
Total time: approximately 1 1/2 hours

Ingredients:
For the apples
  • 4 cups of apples peeled, sliced & pared (about 3-4 medium apples--I use Granny Smith or similar)
  • 2 mounded teaspoons of cinnamon
  • 3-4 tablespoons white sugar
  • 3 tablespoons orange juice
For the crisp topping
  • 3/4 cup brown sugar
  • 3/4 cup brown rice flour
  • 1/2 cup butter or margarine
  • 1/4 teaspoon ground cloves
Instructions:
  1. Preheat oven at 350 degrees.
  2. Put apples in a greased 8x8 baking pan, sprinkle with orange juice, and then mix to coat apples.
  3. In a small bowl, combine cinnamon and sugar. Sprinkle on apples and mix.
  4. Combine the brown sugar, brown rice flour, and ground cloves in a separate bowl and mix.
  5. Soften the butter or margarine and knead into the rice-flour mixture. Mix thoroughly.
  6. Crumble the rice-flour mixture over the apples.
  7. Bake at 350 degrees for 40-50 minutes. Apples should be soft when you poke them.
  8. Serve warm with a scoop of ice cream or whipped cream.
Enjoy!


P.S.
In the past, I've always weaved the pictures and recipe instructions together. However, I thought placing all of the recipe instructions at the end might make it a little more user-friendly, and it seems to be what most "food bloggers" do. I hope you like it!


Monday, July 8, 2013

Dairy-Free, Gluten-Free Coconut Ice Cream Recipe Review


Coconut Ice Cream Recipe Review
WARNING: Deliciousness ahead!

I recently tried this recipe for dairy-free, gluten-free coconut ice cream from Sandi's Allergy Free Recipes, and--WOW--am I glad I did. It was easy-to-make, required few ingredients, and tasted oh-so-good. If you have the double-whammy of a gluten-free and dairy-free diet, it is definitely worth checking out.


The ingredients:
  • canned coconut milk
  • honey (or desired sweetener)
  • vanilla extract
  • egg yolks
  • sea salt
And a few notes:
  1. The recipe directs you to refrigerate the canned coconut milk overnight before using it. Make sure the cans are unopened when you do this, or the milk won't set up correctly (FYI: This is also true if you are looking to make the "coconut whipped cream" that is all over Pinterest). Personally, I used one unopened chilled can and one open chilled can, and it turned out just fine.
  2. I used regular old sugar rather than honey. I am too cheap (and lazy?) for any fancy sweeteners, and I don't mind refined sugar.
  3. I completely forgot to add vanilla extract and sea salt. Oops. It still tasted great.
  4. The recipe calls calls for egg yolks, and I immediately wondered why you couldn't just use whole eggs. I did a quick Google search, and the short answers are a) It's tradition b) Egg whites taste "eggy" c) Egg whites contain water, which may lead to ice crystals in your ice cream.

Enjoy!

I know my pint-sized sous chef and I certainly did!


Sunday, June 30, 2013

Roadside Wildflowers


Roadside Wildflowers
by Lisa M. Hamel
July 2010
Pinetop, Arizona


For many years, my in-laws have held a family reunion at the family cabin Pinetop-Lakeside over Fourth of July weekend. Among many other things, I love the opportunity it brings me to take pictures of beautiful wildflowers, like what you see above.

Friday, June 28, 2013

Jack In The Box & Online Allergy Charts

My husband is a bit of a Jack In The Box addict, and tonight he asked me if I wanted anything as he left for his oh-so-frequent burger run. French fries sounded lovely, but I knew should double-check Jack's online allergen chart just to be safe (I hadn't checked it since they did away with natural-cut fries).

A few clicks later, I was brought to this site, which contains the allergy chart depicted below. This is by no means the complete chart, but for your viewing pleasure, I highlighted the "wheat" column with a giant red arrow. If it has an X in that lovely burnt-orange column, it is a no-go for anyone on a gluten-free diet.


If you aren't familiar with online allergy charts, most major chain restaurants have them, and they can be very helpful for people with special dietary needs. For example, in about two minutes, I was able to determine that while the fries at Jack In The Box are somewhat safe* since they do not contain wheat, the tacos that I have eaten many times in the past are actually a definite no.

Several years ago, a similar chart from Panda Express taught me something everyone on a gluten-free diet learns sooner or later--wheat-containing soy sauce is one of the worst hidden sources of gluten imaginable. Curse you, Kikkoman!**

Allergen charts can also be helpful in revealing "safe" menu items you may not have considered otherwise. Here is a sampling of the Jack-In-The-Box items considered "wheat-free:"
  • French fries
  • smoothies (mango, strawberry, or strawberry banana; contains milk)
  • Chiquita apple bites with caramel (caramel contains milk)
  • Grilled chicken strips (choose your sauce carefully)
  • Chicken Club, Grilled Chicken, or Southwest Chicken salads (ONLY with grilled chicken--not crispy chicken; ask for no croutons or crunchy toppings)
  • Bacon Ranch, Ranch, Lite Ranch, & Low Fat Balsamic Vinaigrette dressings (all but the vinaigrette contain milk)
However, please be aware of the possibility of cross-contamination anytime you dine out. French fries are often cooked in the same oil as gluten-containing, battered items like chicken strips, and a seemingly "wheat free" shake may be contaminated by the residual crumbs left on the blender from the Oreo-cookie shake mixed just before. When in doubt, ask the workers how the food is prepared and listen to your body when you try something new.

During my search, I also discovered this site, which provides an item-by-item ingredients list for essentially every item on the Jack In The Box. Check out the screen shot below:


Online ingredient statements like this tend to be much denser and more difficult to navigate. As my illustration shows (thank you again, big red arrow), bold lettering at the end of each ingredient list will indicate which of the major allergens, if any, the product contains. If accompanied by the allergy chart above, ingredient statements can be excellent way to get more information about items your are considering ordering or items you must now eliminate. 

This ingredient statement, for example, taught me that the cheap, 2 for $0.99 tacos taste so disgusting because their meat is padded out with things like "defatted soy grits" and "bleached enriched wheat flour." At the same time, it showed that while all of the burgers are marked as containing wheat in the allergy chart, that is simply because of their buns--the patties are 100% beef with no other ingredients or additives.

If you know in advance you will be eating out, take the time to check out a few restaurants online. If you dine at a restaurant often, do some research, even if that means calling and asking to speak to a manager, owner, or head chef. The better you are about being 100% gluten-free, the better you will feel.

Want more gluten-free dining tips?

Check out my Wining and Dining information page.

*I classify Jack's French fries as "somewhat safe" because they are almost certainly cooked in the same oil as their chicken strips and other gluten-containing items. This is a common source of cross-contamination. Although I tried the French fries tonight, I don't think I would do so again. My abdomen is already feeling a little tight with cramps, and French-fried potatoes just aren't worth the risk.

**If you simply adore soy sauce and/or Asian foods, Pei Wei and P.F. Chang's (which are partner companies) both have excellent gluten-free menus--you can find links to their online menus on my Wining and Dining information page. SAN-J Organic Tamari is labeled gluten-free soy sauce, and La Choy soy sauce does not contain wheat, although it is not labeled gluten-free.

P.S.

I am linking to Gluten-Free Fridays hosted by Vegetarian Mama. Pop on over and check it out!


Monday, June 24, 2013

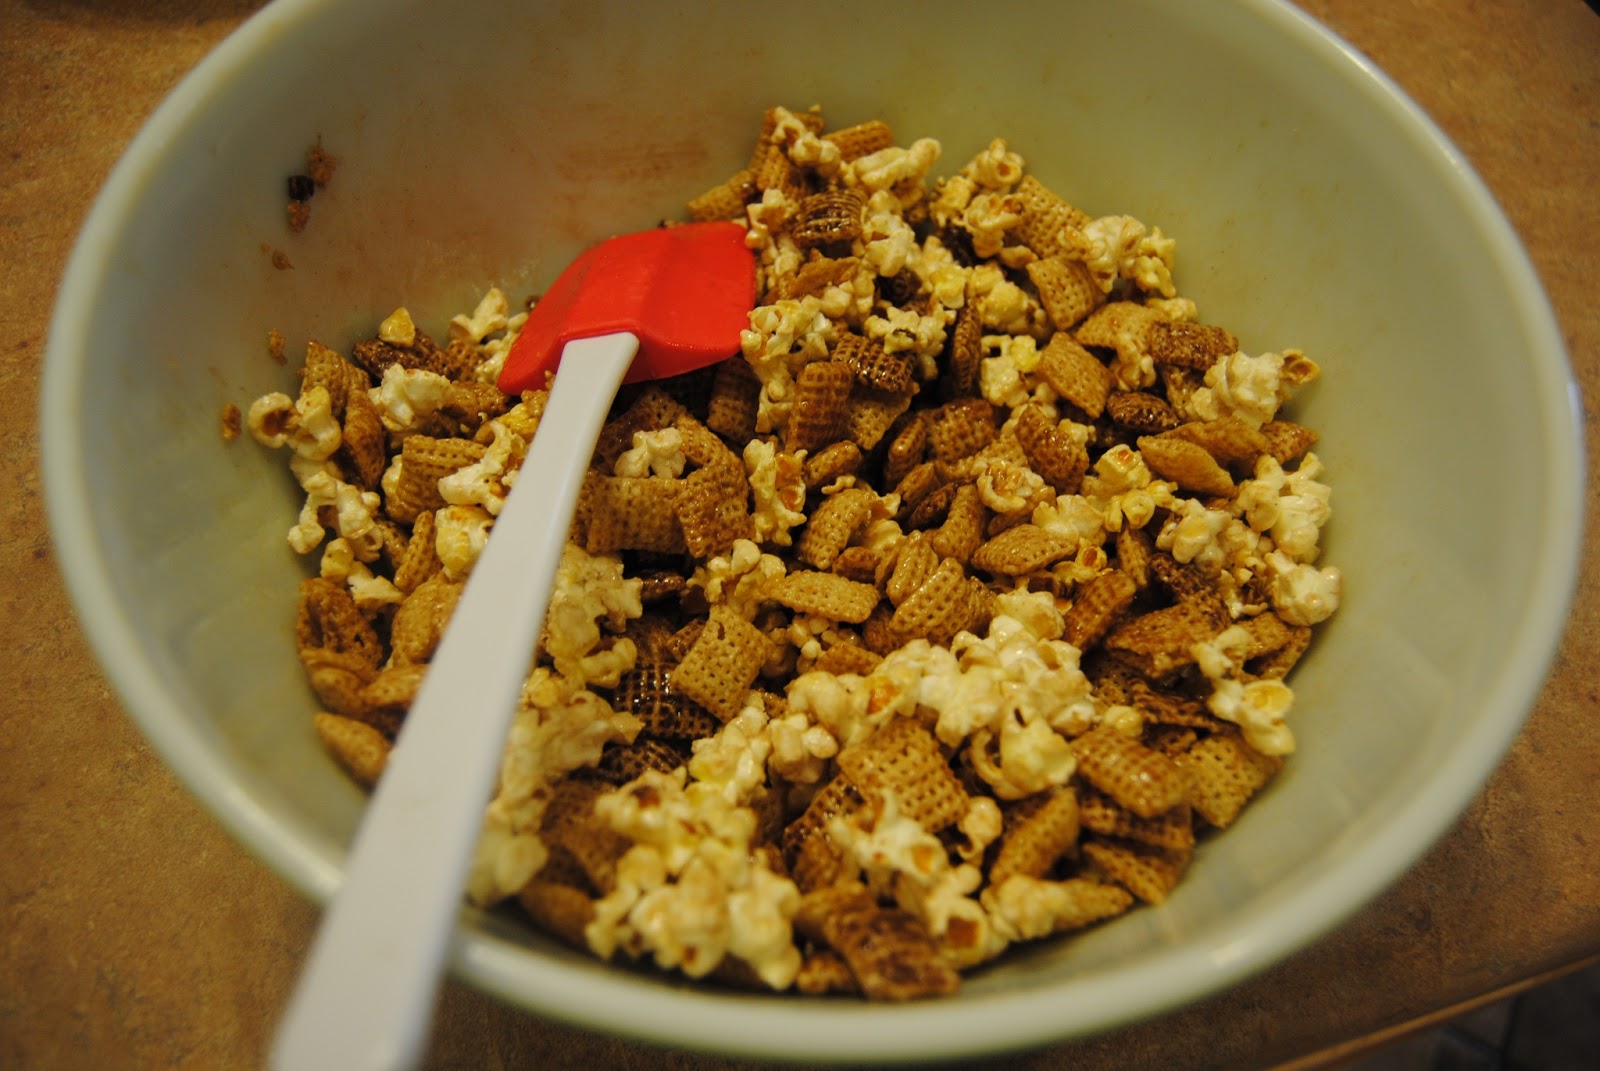
Snickerdoodle Chex Mix


Snickerdoodle Chex Mix
like the cookies I remember


FYI: This is not a sponsored a post. I just really liked this recipe and gluten-free Chex cereals in general.


When I was growing up (and eating whatever I wanted) snickerdoodles were always my favorite cookie. I don't know if it was the taste, helping my mom roll them in cinnamon and sugar, or that adorable name, but I always loved them--especially when they were still warm and soft from the oven. 

Now that I am an adult and following a strict gluten-free diet, I can no longer follow my mother's snickerdoodle recipe or buy them at the local bakery--but I can enjoy this Snickerdoodle Chex Mix recipe. I have been eyeing it on the side of my gluten-free Chocolate Chex and gluten-free Cinnamon Chex cereal boxes for years now, and I am so glad I finally tried it! 

It's quick, it's easy, and it's the perfect to conquer those snickerdoodle cravings. Better yet? Nothing but common, everyday ingredients!

Word to the wise: If you use margarine, 20 seconds in the microwave is plenty to melt it.

Ingredients:
  • sugar
  • ground cinnamon
  • Cinnamon Chex® cereal
  • Chocolate Chex® cereal
  • popcorn
  • butter or margarine

Prep Time: 15 minutes
Start to finish: 15 minutes


It's as easy as...
ONE


TWO


THREE!


But don't forget to let it cool off before you dig in...


Looking for more gluten-free Chex mix recipes? Click here to visit their complete list of gluten-free Chex-mix recipes. There are a few in there that might surprise you. Mashed-potato-stuffed meatloaf squares, anyone?

Here are a few I may try in the future:
Enjoy!


What's your favorite Chex mix recipe?


Thursday, June 20, 2013

Gluten-Free Spicy Vegetable Soup


Gluten-Free Spicy Vegetable Soup
tasty, hearty, & easy-to-make

This is probably one of my all-time favorite recipes--gluten-free or not. My mom shared it with me roughly ten years ago, and my family never gets sick of it. The list of ingredients is fairly short, but the finished product is filled with a variety of vegetables, just the right amount of spice, and a decent helping of protein. While the process is quite simple, the results are amazing! And the best part of all--it provides a well-balanced dinner while dirtying just one pot. If you ever have to bring a dish to a church potluck, this is a winner.


First, the ingredients: 
  • 1 to 1 1/2 pounds of ground beef or turkey
  • 1 cup chopped onion
  • 1 cup sliced celery
  • 1 diced red or green bell pepper
  • 2 cloves garlic, minced
  • 1 large jar (approx. 30 oz.) Chunky Garden Style spaghetti sauce*
  • 1 large can (approx. 10 oz.) diced tomatoes, partially drained
  • 1 bag (16 oz.) frozen mixed vegetables
  • 1/2 to 1 tablespoon crushed red pepper flakes**
*I use Prego Fresh Muschroom or Tomatoes & Garlic. Both are labeled gluten-free.
**You can substitute chili powder, but you will need to increase the amount.

Don't forget--Add at end to taste:
  • 1 to 2 tablespoons sugar (optional--helps cut acidity)
  • 1 teaspoon salt
  • 1/2 teaspoon ground pepper
Now, the instructions:

Cook the ground beef or turkey in a large pot, stirring until browned and broken up. Drain fat if needed. 


Add onion, celery, and bell pepper. Cook until limp. FYI: The celery usually takes the longest.


Add spaghetti sauce, canned tomatoes, frozen vegetables, and crushed red pepper. 


Cover and cook at least 10-15 minutes or until the frozen vegetables are thawed and thoroughly cooked. 


Add sugar, salt, and pepper if needed.

Bon appetit!

P.S.
This soup pairs wonderfully with my Simple Gluten-Free Cornbread. 
Click below for the recipe.


Time Warp

Since today is my first "official" day of summer--sayonara summer workshops--I decided to kick it off by baking cornbread muffins for breakfast. My son and husband were still asleep, so I had a unique opportunity to do things like the check the expiration dates on my ingredients and other pantry items.

 Here is what I found:
  • Corn meal: Nov. 11 2013 (safe--but close)
  • Soy milk: Mar 18 2013 (oops)
  • All purpose gluten-free baking mix: Mar. 10 2013 (oops)
  • Vanilla extract: Mar. 6 2012 (double oops)
  • Baking powder: Feb. 2007 (yikes!)

This kind of shows you how often I bake, right?

The only item I actually threw out was the soy milk (after taste-testing it--blech). The baking mix will continue to haunt me for another week or two because the guilt is too strong for me to throw it away right now. But would you blame me for continuing to use the baking powder and vanilla extract until they're gone? I haven't had any problems with them yet, and I am too dang cheap to just throw them away.

How do you keep track of expiration dates? 
Do I simply need to bake more often?

Thursday, June 13, 2013

Grown-Up Gluten-Free PB & J


Grown-Up Gluten-Free PB & J
making an old favorite new again

If I've learned anything since starting this blog, it's that keeping certain ingredients on hand--Craisins, chopped nuts, coconut, fresh fruits and vegetables--can make gluten-free eating significantly more enjoyable. With just a little creativity and a good dose of gourmet bravery, you can break up your routine and enjoy food again. This sandwich is the perfect example.

My son has requested "peanut butter and jelly" almost every day for the past few weeks, and every once in a while I like to indulge him. At the same time, I like us to share our meals, and I need a little more than jelly and peanut butter to get me excited about lunch. 

Enter the following ingredients to the rescue:

  • gluten-free bread, toasted*
  • peanut butter**
  • your choice of jam or honey
  • fresh banana slices
  • slivered almonds
  • shredded coconut
*My favorites are Glutino's Flaxseed and Grains For Life's Millet & Brown Rice. Gluten-free bread always tastes better toasted.
**JIF is labeled gluten-free

Assemble all ingredients in the order listed above.

Enjoy!


Friday, May 31, 2013

Are you bugged by your gluten-free limitations?

I was out to dinner with my large family of in-laws, and my father-in-law calls across the table, "Hey, Lisa, I found an article you might be interested in." This is the link he shows me on his smart phone:


National Geographic: Daily News
Cicada Recipes: Bugs Are Low-Carb, Gluten-Free Food
Blanched, boiled, or candied, cicadas are a healthy snack, experts say.

Umm...thank you?

Obviously, my father-in-law was joking (he does that a lot), but I am wondering why National Geographic--a credible magazine if there ever was one--chose to take this particular approach to the article. I mean, do they think celiacs everywhere have been saying to themselves, "You know, I really want to try cicadas, but I just don't know if they are gluten-free?" Curious, indeed.

On the flip side, I guess it always feels good to add another gluten-free snack to your list of options...right?

Sunday, May 26, 2013

Two-Ingredient Gluten-Free Tacos


Two-Ingredient Gluten-Free Tacos
tacos from a jar & tips on using corn tortillas

Tacos have been a staple of mine for a long time, but until recently I relied on McCormick's taco seasoning to make them. Although the mix isn't labeled gluten-free, the ingredients list seems safe, and it is much more convenient than trying to follow a taco recipe from scratch. It wasn't perfect, but it worked for us.

Since I started this blog, however, I have started paying more attention to what I eat and what I can do to improve it. I have noticed that I enjoy meals best when they include a "healthy" aspect, such as additional fruits and vegetables, and when I do something to make them my own, even if it is a simple as adding fresh tomatoes to a jar of store-bought pasta sauce. As I considered how I could improve our taco routine, I knew I needed to find a way to a) use a labeled gluten-free mix and b) add vegetables without a lot of work. 

My solution? I substituted a jar of gluten-free salsa in place of taco seasoning!

The ingredients:
  • 1 small jar of gluten-free salsa*
  • approximately 1 pound of ground beef
  • gluten-free corn tortillas or taco shells**
  • your choice of toppings
* Pace and La Victoria are both good options, but any gluten-free salsa will work.
**Mission corn products are labeled gluten-free and produced on dedicated lines. La Banderita corn tortillas are also labeled gluten-free.

The instructions:

Brown the ground beef in a large frying pan on medium to medium-high heat. If you are like me and hate clumpy taco filling, keep breaking up the meat to make sure it is nice and fine.


When the meat is thoroughly cooked and no pink remains, drain the fat and reduce the heat low or medium-low.

Slowly add salsa until all of the meat is well-coated, stirring as you go. I used about half of a standard-size jar, but I recommend adding a little at a time to make sure you don't overdo it...and wind up with soup.


Continue cooking and stirring until all of the liquid is absorbed. I forgot to time it (sorry!), but this should take about five to ten minutes.


Spoon into gluten-free tortillas or taco shells, top with your favorite toppings, and enjoy!


A few final caveats and notes:
  1. I will be honest. My husband said the first go-round tasted kind of ketchup-ey (I used Pace mild salsa), so next time I will kick it up a notch and try medium salsa or a different brand.
  2. Feel free to be creative. If you like spicier tacos, use medium or hot salsa, or add chili powder, crushed red pepper, or a can of diced green chilies. If you like fresh vegetables, throw in diced tomatoes, onions, or bell peppers.
  3. Sorry if my instructions aren't very specific. I am not an experienced chef, and I prefer the try-it-and-see approach. I figure if I can make it, anyone who is allowed to operate a stove probably can too.
And some advice regarding soft corn tortillas:

If you have ever shied away from soft corn tortillas before, I am going to guess it is because they crumble and break as you try to eat them. Good news! You can alleviate that problem by warming the tortillas (a painfully simple trick I learn from my uncle in-law).

I prefer to steam them in the steamer basket that came with my pots and pans set because it has the best result, but you could also warm them in a skillet or frying pan or nuke them in the microwave. Whichever way you choose, warming your corn tortillas will render them much more soft, supple, and tasty!

  • Using a steamer basket Start boiling water in the appropriate pot after you drain the fat from the meat--an inch or two deep is plenty. Covering the basket with a lid will help the water boil faster, but it is not necessary. When the water is boiling, place the tortillas in the basket, one tortilla at a time. Cover the basket with a lid, and let the tortilla steam for 5-10 seconds. Remove the tortilla with tongs--it will be hot! NOTE: If you steam them too long, they will turn mushy and fall apart.
  • Using a skillet or frying pan If you go this route, make sure you use very low heat or maybe a non-stick pan if you need one. Heating an empty non-stick pan can damage the coating, so make sure the tortilla is in the pan before you turn it on. Heat the tortilla until it is warm to the touch.
  • Using the microwave Warming tortillas in the microwave is my second favorite option because it is quick, available at work, and still results in (more or less) steamed tortillas. If you are using the microwave, your best option is to spread the tortillas on a microwave-safe plate (warm tortillas tend to stick together), place a coffee mug full of water in the corner, and microwave the tortillas for about 10 seconds. If that is not long enough, heat them again for about 5 seconds, repeating until they are the desired warmth (again, they get mushy if they are heated for too long). Alternatively, you could place the tortillas between wet paper towels before microwaving them, again for about 10 seconds.