Showing posts with label dessert. Show all posts

Monday, July 22, 2013

Delicious Gluten-Free Apple Crisp


Delicious Gluten-Free Apple Crisp
a dessert baked with love

My mother is the type of woman who believes in making things from scratch and that everyone should have a delicious dessert at Thanksgiving. When I finally committed to a 100% gluten-free diet, this became a bit of a challenge, at least as far as I concerned. Although I was happy with apples baked in cinnamon and sugar, store-bought gluten-free apple pies, and gluten-free brownies from Betty Crocker's delicious mix, my mom wasn't satisfied until she came up with this delicious treat. It's so good, even the glutenites* at your table will dig in!

*Yes, I am working really hard to coin this phrase, but doesn't "glutenite" roll off the tongue so much better than "people who can eat gluten" or "people who are not gluten-free?"

(Scroll down for complete recipe)


Delicious Gluten-Free Apple Crisp
Yields: one 8x8 pan
Hands on time: 30-45 minutes (includes peeling, slicing and paring the apples)
Total time: approximately 1 1/2 hours

Ingredients:
For the apples
  • 4 cups of apples peeled, sliced & pared (about 3-4 medium apples--I use Granny Smith or similar)
  • 2 mounded teaspoons of cinnamon
  • 3-4 tablespoons white sugar
  • 3 tablespoons orange juice
For the crisp topping
  • 3/4 cup brown sugar
  • 3/4 cup brown rice flour
  • 1/2 cup butter or margarine
  • 1/4 teaspoon ground cloves
Instructions:
  1. Preheat oven at 350 degrees.
  2. Put apples in a greased 8x8 baking pan, sprinkle with orange juice, and then mix to coat apples.
  3. In a small bowl, combine cinnamon and sugar. Sprinkle on apples and mix.
  4. Combine the brown sugar, brown rice flour, and ground cloves in a separate bowl and mix.
  5. Soften the butter or margarine and knead into the rice-flour mixture. Mix thoroughly.
  6. Crumble the rice-flour mixture over the apples.
  7. Bake at 350 degrees for 40-50 minutes. Apples should be soft when you poke them.
  8. Serve warm with a scoop of ice cream or whipped cream.
Enjoy!


P.S.
In the past, I've always weaved the pictures and recipe instructions together. However, I thought placing all of the recipe instructions at the end might make it a little more user-friendly, and it seems to be what most "food bloggers" do. I hope you like it!


Monday, July 8, 2013

Dairy-Free, Gluten-Free Coconut Ice Cream Recipe Review


Coconut Ice Cream Recipe Review
WARNING: Deliciousness ahead!

I recently tried this recipe for dairy-free, gluten-free coconut ice cream from Sandi's Allergy Free Recipes, and--WOW--am I glad I did. It was easy-to-make, required few ingredients, and tasted oh-so-good. If you have the double-whammy of a gluten-free and dairy-free diet, it is definitely worth checking out.


The ingredients:
  • canned coconut milk
  • honey (or desired sweetener)
  • vanilla extract
  • egg yolks
  • sea salt
And a few notes:
  1. The recipe directs you to refrigerate the canned coconut milk overnight before using it. Make sure the cans are unopened when you do this, or the milk won't set up correctly (FYI: This is also true if you are looking to make the "coconut whipped cream" that is all over Pinterest). Personally, I used one unopened chilled can and one open chilled can, and it turned out just fine.
  2. I used regular old sugar rather than honey. I am too cheap (and lazy?) for any fancy sweeteners, and I don't mind refined sugar.
  3. I completely forgot to add vanilla extract and sea salt. Oops. It still tasted great.
  4. The recipe calls calls for egg yolks, and I immediately wondered why you couldn't just use whole eggs. I did a quick Google search, and the short answers are a) It's tradition b) Egg whites taste "eggy" c) Egg whites contain water, which may lead to ice crystals in your ice cream.

Enjoy!

I know my pint-sized sous chef and I certainly did!


Monday, June 24, 2013

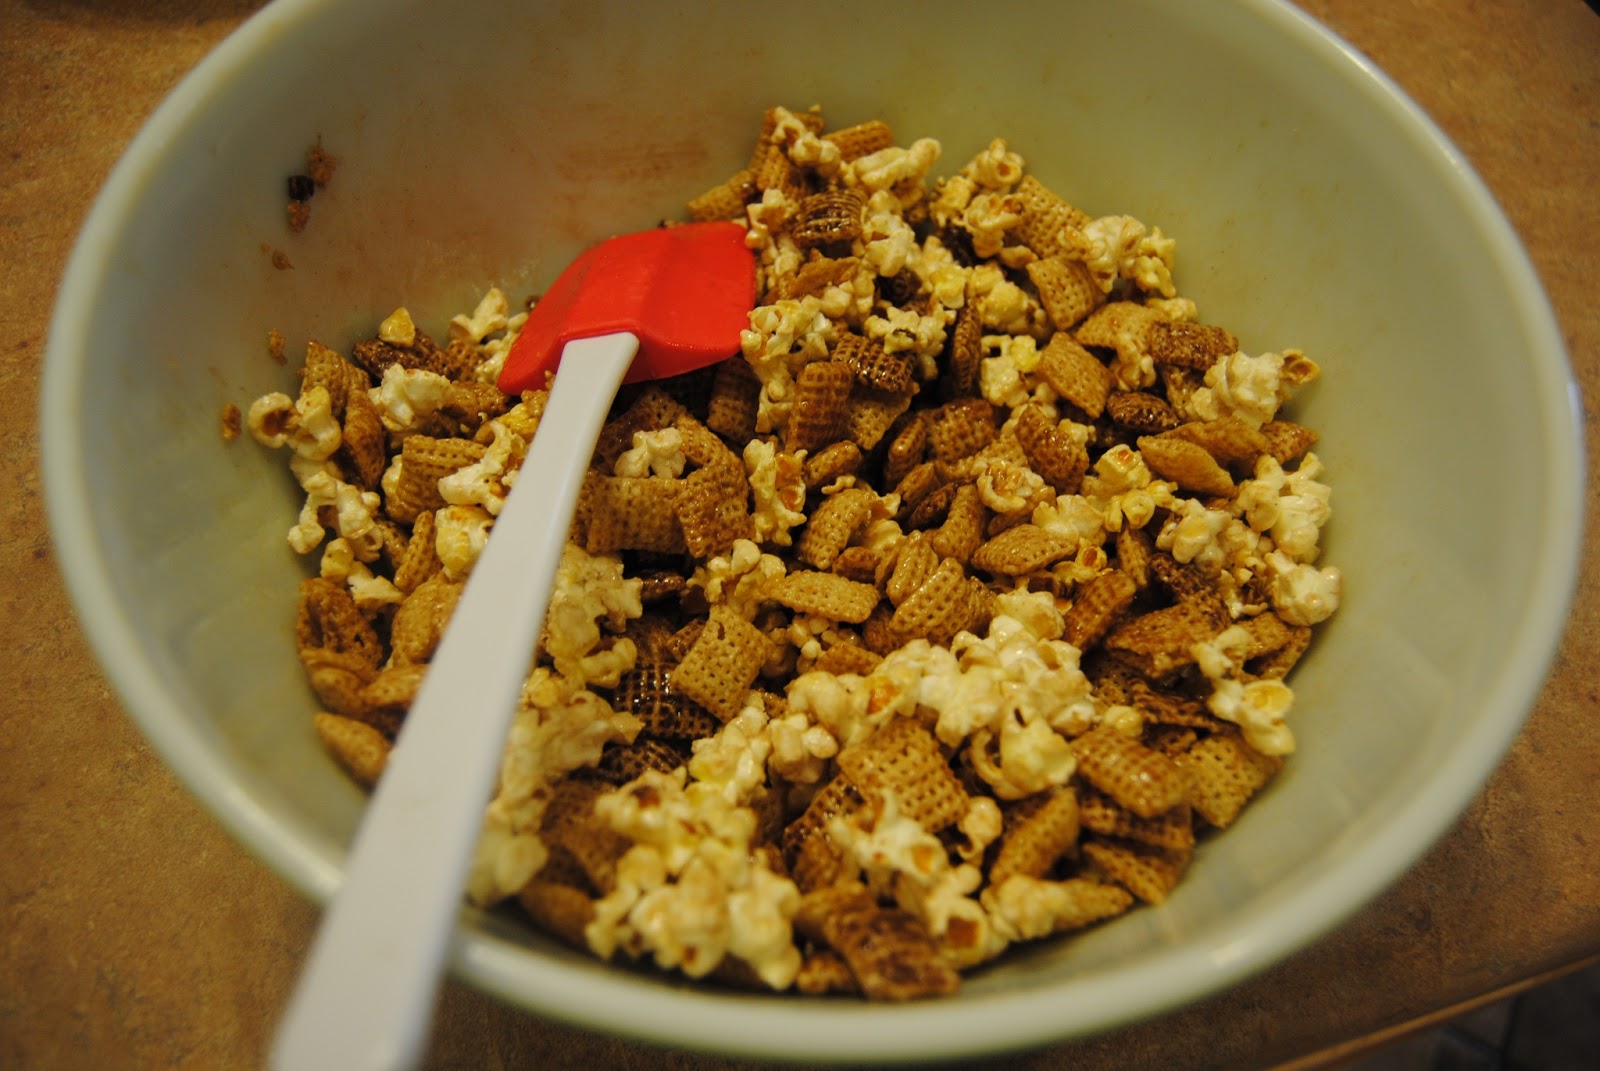
Snickerdoodle Chex Mix


Snickerdoodle Chex Mix
like the cookies I remember


FYI: This is not a sponsored a post. I just really liked this recipe and gluten-free Chex cereals in general.


When I was growing up (and eating whatever I wanted) snickerdoodles were always my favorite cookie. I don't know if it was the taste, helping my mom roll them in cinnamon and sugar, or that adorable name, but I always loved them--especially when they were still warm and soft from the oven. 

Now that I am an adult and following a strict gluten-free diet, I can no longer follow my mother's snickerdoodle recipe or buy them at the local bakery--but I can enjoy this Snickerdoodle Chex Mix recipe. I have been eyeing it on the side of my gluten-free Chocolate Chex and gluten-free Cinnamon Chex cereal boxes for years now, and I am so glad I finally tried it! 

It's quick, it's easy, and it's the perfect to conquer those snickerdoodle cravings. Better yet? Nothing but common, everyday ingredients!

Word to the wise: If you use margarine, 20 seconds in the microwave is plenty to melt it.

Ingredients:
  • sugar
  • ground cinnamon
  • Cinnamon Chex® cereal
  • Chocolate Chex® cereal
  • popcorn
  • butter or margarine

Prep Time: 15 minutes
Start to finish: 15 minutes


It's as easy as...
ONE


TWO


THREE!


But don't forget to let it cool off before you dig in...


Looking for more gluten-free Chex mix recipes? Click here to visit their complete list of gluten-free Chex-mix recipes. There are a few in there that might surprise you. Mashed-potato-stuffed meatloaf squares, anyone?

Here are a few I may try in the future:
Enjoy!


What's your favorite Chex mix recipe?


Saturday, May 4, 2013

Have your cake, and eat it, too!


Let them eat cake!

I have been wanting to write this post for a few weeks now, and tonight I am finally getting around to it. 

Earlier this month, I turned the big 3-0. Partly because I am vain and partly because I think that it is a legitimate milestone, I was determined to do something to mark the occasion. Although I fussed over many different ideas and party themes from roughly November to March, I finally decided to keep it simple: close family and friends, pizza, salad and dessert. 

Of course, I ordered a gluten-free pizza for myself, but I was still indecisive about dessert. How could I possibly get away with serving people gluten-free birthday cake? At the same time, how could I deny myself such a quintessential part of the birthday-girl experience? Like I said, I'm vain. In the end, I decided I would have my gluten-free birthday cake, just like I wanted, but I would supply root beer floats and a more traditional dessert baked by my gracious and talented friend Stephanie for my guests. It seemed like a good plan and an easy way to appease everyone.

Was I wrong? Not exactly.

The thing is, everybody loves birthday cake--gluten-free or not. Although I warned all of my guests that the cake was gluten-free, everyone had a piece, and no one complained. In fact, I think they actually liked it, although it was different in texture and consistency than they are accustomed to. Cake is cake, right? On top of that, no one even took me up on the offer of root beer floats, and Stephanie took home her dessert untouched (she has a large extended family, so she didn't mind). Maybe they ate the cake because they were curious. Maybe they ate it because they were being polite. Or maybe Betty Crocker's Gluten-Free Yellow Cake Mix doesn't really taste so far different from the original version I remember from my youth. Bottom line--A cake I thought might turn out to be a disaster for me was actually as much of a success among my guests as any gluten-containing store-bought concoction would have been. 

At some point during the day--probably around the time I was looking at three or four untouched gallons of vanilla ice cream in my freezer--I realized that it was time for me to stop doing what I thought would make other people happy and start doing what makes me happy. In the end, they often work out to be the same thing--at least when you are dealing with people who love you.

It's my party, and I'll {have a double-layer gluten-free birthday cake with sprinkles on top} if I want to

Once I knew I was going to have my own Lisa-friendly, gluten-free, birthday cake, I also knew I needed to pull out all of the stops to make it as cute as possible. For me, that meant a double-layer cake with lots of frosting and cute embellishments displayed on one of my three sparkling cake stands. Although I was a little nervous about taking on a double-layer, gluten-free cake, I did it anyway.

The end result? I am very glad I did.

Initially, I was convinced the gluten-free cake would fall apart or be too crumbly to layer effectively. In fact, it was the exact opposite. The cake held together beautifully, and Stephanie said it was easier to frost than a gluten-containing cake because there were so few crumbs. At one point, we even picked up one of the two cake layers by hand and set it aside (I forgot to spread frosting between the layers). Can you even imagine doing that with a traditional cake? It would fall apart as soon as look at you.

Although I don't plan on baking another cake soon, I would definitely try the gluten-free, double-layer option again.


P.S.

If you're curious, I used two boxes of Betty Crocker's Gluten-Free Yellow Cake Mix (just follow the directions on the box), one container of Betty Crocker's Whipped Vanilla Frosting (next time I would buy two--all of their frosting is labeled gluten-free), and two 9x9 square backing pans to bake this cake. The sprinkles were not labeled gluten-free, but they seemed safe as they had no gluten-containing ingredients.


Wednesday, March 6, 2013

Gluten-Free Cake-Mix Cookies


original recipe source

Gluten-Free Cake-Mix Cookies
makes approximately 2 1/2 dozen cookies

My crafty friend, Desiree, shared this wonderful recipe on her blog, Your Crafty Friend. The ingredients include 1 box of cake mix, 2 eggs, 1/2 cup of vegetable oil, and a small amount of sugar. Using just those four ingredients you can make up to three dozen cookies! I decided to be brave and tried the recipe using a gluten-free cake mix. It was a rousing success!

Ready to try it yourself? Make sure you follow the directions below, not the directions on the cake-mix box!

Start by collecting your ingredients:
  1. 1 box of gluten-free cake mix (I used Betty Crocker Devil's Food Cake Mix, Gluten-Free)
  2. 2 eggs
  3. 1/2 cup vegetable oil
  4. sugar to roll the cookies in (Desiree@YourCraftyFriend suggests about 1/4 cup)
(pint-size sous chef optional)

Next, combine the cake mix, eggs, and oil in a large mixing bowl. Stir thoroughly until all ingredients are combined. At this point, start preheating your oven to 350 degrees.


(make sure your sous chef doesn't get distracted)

At this point, my dough resembled very dark, gritty, wet soil.

For the next step, you will need a small bowl of sugar and one or two greased cookie sheets. Now, roll the dough into one-inch balls. For the gluten-free mix, you will probably need to "pat" it into shape more than roll it. Also, if the dough seems hard to work with, you may want to chill it in the refrigerator for a few minutes. Roll each ball in sugar and place it on a greased cookie sheet. Space the cookies about two inches apart.

Finally, bake the cookies at 350 degrees for 8-10 minutes or until the center is firm. As Desiree explains on her blog, the cookies will probably look a little puffy when they first come out, but they will settle as they cool.

Ding! The sound of success!

Make sure you let the cookies cool completely before you gobble them up. Gluten-free baked-goods tend to be crumbly, so letting them cool first can make a big difference.

(waiting is the hardest part) 


At last--time to dig in and enjoy!

This kitchen (mis)adventure was a definite success!


Feeling adventurous? Try the recipe and let me know how it goes.

Ready to experiment? Desiree recommends different combinations, such as rolling the cookies in chopped-up Andes mints instead of sugar. What creative combinations can you come up with? Share your ideas here or on Desiree's original recipe post.

P.S.

I am linking to Gluten-Free Fridays hosted by Vegetarian Mama. Pop on over and check it out!