
Showing posts with label quick & easy. Show all posts

Monday, June 24, 2013

Snickerdoodle Chex Mix


Snickerdoodle Chex Mix
like the cookies I remember


FYI: This is not a sponsored a post. I just really liked this recipe and gluten-free Chex cereals in general.


When I was growing up (and eating whatever I wanted) snickerdoodles were always my favorite cookie. I don't know if it was the taste, helping my mom roll them in cinnamon and sugar, or that adorable name, but I always loved them--especially when they were still warm and soft from the oven. 

Now that I am an adult and following a strict gluten-free diet, I can no longer follow my mother's snickerdoodle recipe or buy them at the local bakery--but I can enjoy this Snickerdoodle Chex Mix recipe. I have been eyeing it on the side of my gluten-free Chocolate Chex and gluten-free Cinnamon Chex cereal boxes for years now, and I am so glad I finally tried it! 

It's quick, it's easy, and it's the perfect to conquer those snickerdoodle cravings. Better yet? Nothing but common, everyday ingredients!

Word to the wise: If you use margarine, 20 seconds in the microwave is plenty to melt it.

Ingredients:
  • sugar
  • ground cinnamon
  • Cinnamon Chex® cereal
  • Chocolate Chex® cereal
  • popcorn
  • butter or margarine

Prep Time: 15 minutes
Start to finish: 15 minutes


It's as easy as...
ONE


TWO


THREE!
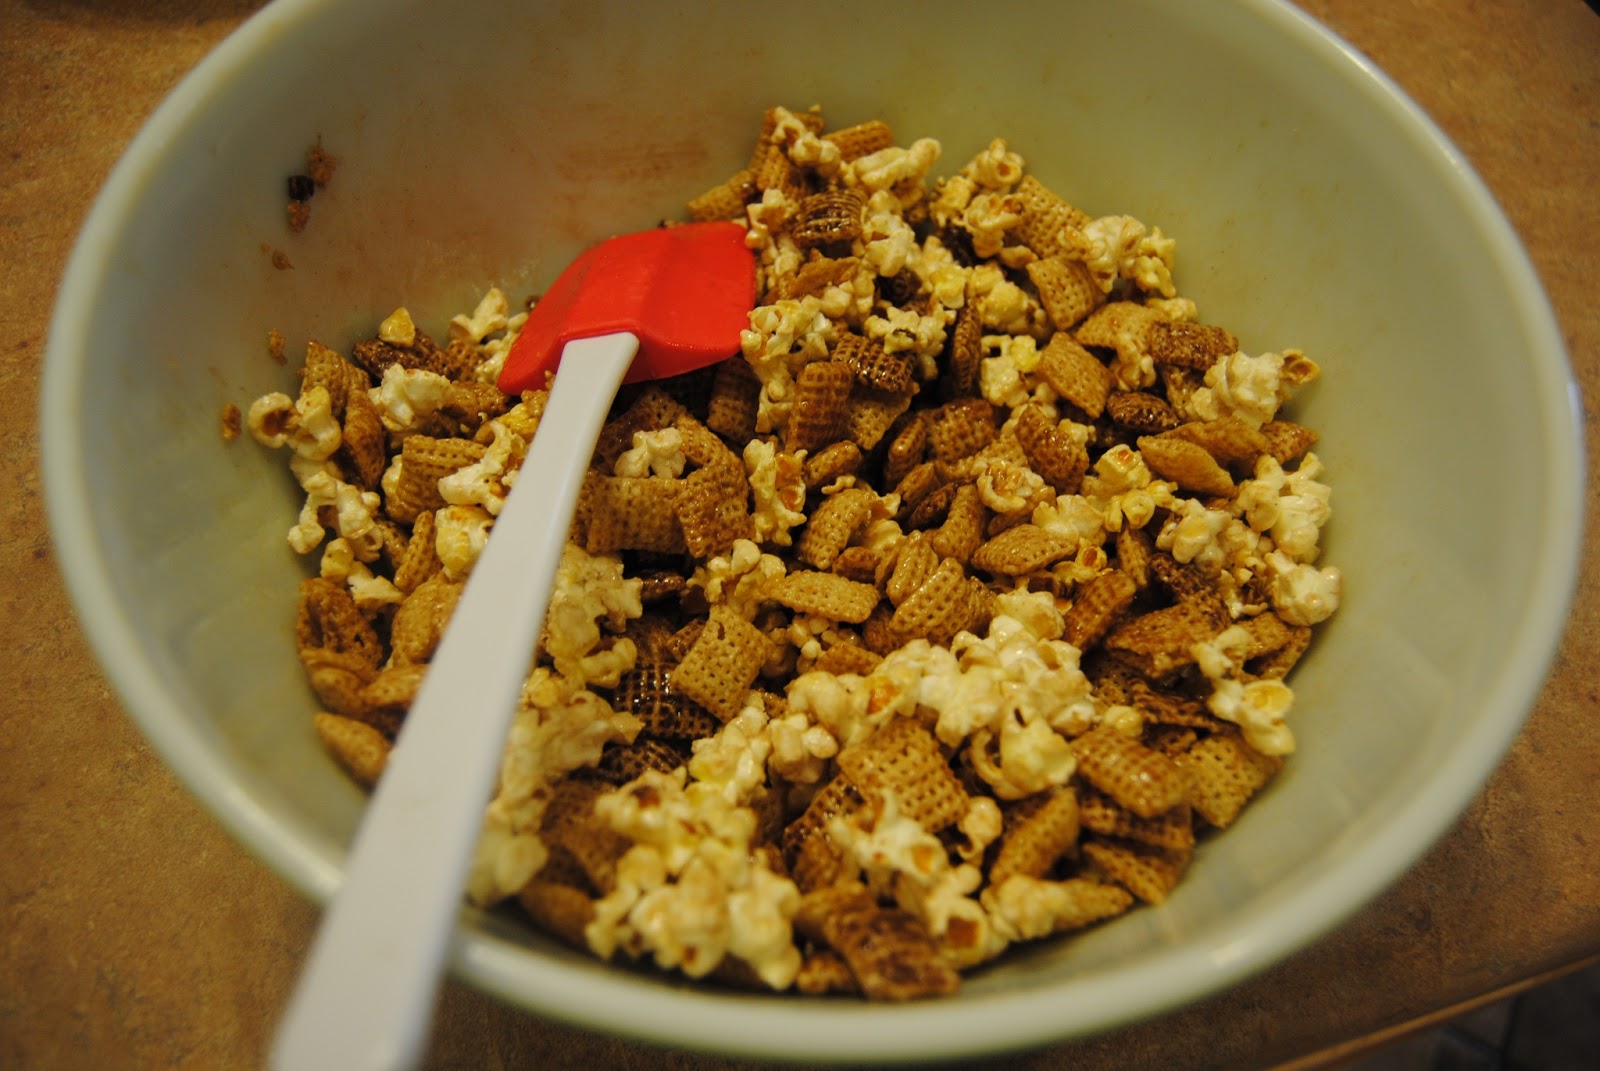


But don't forget to let it cool off before you dig in...


Looking for more gluten-free Chex mix recipes? Click here to visit their complete list of gluten-free Chex-mix recipes. There are a few in there that might surprise you. Mashed-potato-stuffed meatloaf squares, anyone?

Here are a few I may try in the future:
Enjoy!


What's your favorite Chex mix recipe?


Thursday, June 13, 2013

Grown-Up Gluten-Free PB & J


Grown-Up Gluten-Free PB & J
making an old favorite new again

If I've learned anything since starting this blog, it's that keeping certain ingredients on hand--Craisins, chopped nuts, coconut, fresh fruits and vegetables--can make gluten-free eating significantly more enjoyable. With just a little creativity and a good dose of gourmet bravery, you can break up your routine and enjoy food again. This sandwich is the perfect example.

My son has requested "peanut butter and jelly" almost every day for the past few weeks, and every once in a while I like to indulge him. At the same time, I like us to share our meals, and I need a little more than jelly and peanut butter to get me excited about lunch. 

Enter the following ingredients to the rescue:

  • gluten-free bread, toasted*
  • peanut butter**
  • your choice of jam or honey
  • fresh banana slices
  • slivered almonds
  • shredded coconut
*My favorites are Glutino's Flaxseed and Grains For Life's Millet & Brown Rice. Gluten-free bread always tastes better toasted.
**JIF is labeled gluten-free

Assemble all ingredients in the order listed above.

Enjoy!


Sunday, May 26, 2013

Two-Ingredient Gluten-Free Tacos


Two-Ingredient Gluten-Free Tacos
tacos from a jar & tips on using corn tortillas

Tacos have been a staple of mine for a long time, but until recently I relied on McCormick's taco seasoning to make them. Although the mix isn't labeled gluten-free, the ingredients list seems safe, and it is much more convenient than trying to follow a taco recipe from scratch. It wasn't perfect, but it worked for us.

Since I started this blog, however, I have started paying more attention to what I eat and what I can do to improve it. I have noticed that I enjoy meals best when they include a "healthy" aspect, such as additional fruits and vegetables, and when I do something to make them my own, even if it is a simple as adding fresh tomatoes to a jar of store-bought pasta sauce. As I considered how I could improve our taco routine, I knew I needed to find a way to a) use a labeled gluten-free mix and b) add vegetables without a lot of work. 

My solution? I substituted a jar of gluten-free salsa in place of taco seasoning!

The ingredients:
  • 1 small jar of gluten-free salsa*
  • approximately 1 pound of ground beef
  • gluten-free corn tortillas or taco shells**
  • your choice of toppings
* Pace and La Victoria are both good options, but any gluten-free salsa will work.
**Mission corn products are labeled gluten-free and produced on dedicated lines. La Banderita corn tortillas are also labeled gluten-free.

The instructions:

Brown the ground beef in a large frying pan on medium to medium-high heat. If you are like me and hate clumpy taco filling, keep breaking up the meat to make sure it is nice and fine.


When the meat is thoroughly cooked and no pink remains, drain the fat and reduce the heat low or medium-low.

Slowly add salsa until all of the meat is well-coated, stirring as you go. I used about half of a standard-size jar, but I recommend adding a little at a time to make sure you don't overdo it...and wind up with soup.


Continue cooking and stirring until all of the liquid is absorbed. I forgot to time it (sorry!), but this should take about five to ten minutes.


Spoon into gluten-free tortillas or taco shells, top with your favorite toppings, and enjoy!


A few final caveats and notes:
  1. I will be honest. My husband said the first go-round tasted kind of ketchup-ey (I used Pace mild salsa), so next time I will kick it up a notch and try medium salsa or a different brand.
  2. Feel free to be creative. If you like spicier tacos, use medium or hot salsa, or add chili powder, crushed red pepper, or a can of diced green chilies. If you like fresh vegetables, throw in diced tomatoes, onions, or bell peppers.
  3. Sorry if my instructions aren't very specific. I am not an experienced chef, and I prefer the try-it-and-see approach. I figure if I can make it, anyone who is allowed to operate a stove probably can too.
And some advice regarding soft corn tortillas:

If you have ever shied away from soft corn tortillas before, I am going to guess it is because they crumble and break as you try to eat them. Good news! You can alleviate that problem by warming the tortillas (a painfully simple trick I learn from my uncle in-law).

I prefer to steam them in the steamer basket that came with my pots and pans set because it has the best result, but you could also warm them in a skillet or frying pan or nuke them in the microwave. Whichever way you choose, warming your corn tortillas will render them much more soft, supple, and tasty!

  • Using a steamer basket Start boiling water in the appropriate pot after you drain the fat from the meat--an inch or two deep is plenty. Covering the basket with a lid will help the water boil faster, but it is not necessary. When the water is boiling, place the tortillas in the basket, one tortilla at a time. Cover the basket with a lid, and let the tortilla steam for 5-10 seconds. Remove the tortilla with tongs--it will be hot! NOTE: If you steam them too long, they will turn mushy and fall apart.
  • Using a skillet or frying pan If you go this route, make sure you use very low heat or maybe a non-stick pan if you need one. Heating an empty non-stick pan can damage the coating, so make sure the tortilla is in the pan before you turn it on. Heat the tortilla until it is warm to the touch.
  • Using the microwave Warming tortillas in the microwave is my second favorite option because it is quick, available at work, and still results in (more or less) steamed tortillas. If you are using the microwave, your best option is to spread the tortillas on a microwave-safe plate (warm tortillas tend to stick together), place a coffee mug full of water in the corner, and microwave the tortillas for about 10 seconds. If that is not long enough, heat them again for about 5 seconds, repeating until they are the desired warmth (again, they get mushy if they are heated for too long). Alternatively, you could place the tortillas between wet paper towels before microwaving them, again for about 10 seconds.


Tuesday, April 23, 2013

Zatarain's Jambalaya Mix


Zatarain's Jambalaya Mix
a one-pot wonder

I was first introduced to Zatarain's Jambalaya on my first official date with my husband. Although his (former) step-mom was serving spaghetti, she also cooked a box of this special stuff because it is one of my father-in-law's favorite foods. Essentially, jambalaya is a spicy rice-dish from Louisiana. Authentic recipes include variety of fresh vegetables and an assortment of meats, such as chicken, ham, smoked sausage, or shrimp. After one bite, I was hooked.

What I like about Zatarain's Jambalaya is it is quick and easy to prepare, requires only one pot, and is relatively inexpensive. It is a great option for weeknight meals, and I swear it tastes better as leftovers than on the night I cook it. Better yet, it is available at essentially any grocery store, and it is versatile. If I want it a little milder, I add extra water and plain, uncooked white rice. If I want to change it up a bit, I add a fresh vegetable, like diced green bell pepper. No gluten-free sausage available? I can use cooked and diced chicken breast or ham instead. On top of everything else, the smaller packages are even labeled gluten-free! (You can learn more about Zatarain's other gluten-free products here.)


If you are ready to try this Creole creation, here is what you need to do:

  1. Gather your ingredients:
    • 1-2 boxes of Zatarain's Jambalaya Mix
    • Gluten-free meat of choice (cooked chicken, ham, sausage or shrimp--see package for amount)*
    • Water (see package for amount) 
    • 1 green bell pepper optional
    • Small amount of uncooked white rice (see package for amount) optional

      *
      I used Hormel brand's Natural Choice Original Smoked Sausage, purchased at Target.
  2. Start boiling the water according to the package directions before you prepare the other ingredients. Covering the pot will help the water boil faster.
  3. Prepare the remaining ingredients. I usually cut my sausage into half-moons, since it is easier to evenly distribute the smaller pieces.
  4. Once the water is boiling, combine all of the ingredients in the pot and let simmer according to the directions on the package. 
  5. When all the water has been absorbed, your meal is ready. Before you dish it up, make sure to stir the pot thoroughly. The meat tends to float to the top while it is simmering.
Easy, right?


Sunday, April 7, 2013

Creative Gluten-Free Tuna Salad


Creative Gluten-Free Tuna Salad
A.K.A. an easy lunch you'll be proud to eat

I would like to start off by apologizing to anyone who thinks this meal is entirely too pedestrian to deserve the title "kitchen (mis)adventure." I understand where you are coming from, but long story short, my health knocked me on my back this weekend, and there was no way I felt up to trying out a new recipe...although I definitely wanted to.

Additionally, I realize that just about everyone knows how to make tuna salad: open a can of tuna, stir in some mayonnaise, and call it a day. At the same time, one of the greatest challenges of the gluten-free diet is feeling stuck in a rut and limited in your food options--especially if you are not into cooking. This post is about a simple way to put a new spin on an old favorite.

All of that said, let me tell you why I love this recipe: It's easy, adaptable, work-lunch friendly, and healthy.

Now, for the directions.

As always, gather your ingredients first:
  1. 1 can chunk-light tuna in water
  2. 1 stalk of celery, sliced
  3. 1 small carrot, cut into matchstick-sized pieces
  4. 1 handful of dried craisins
  5. 2-3 heaping teaspoons of gluten-free mayonnaise*
*My favorite brand of "safe" mayonnaise is Smart Balance. It is labeled gluten-free, available in nearly every grocery store, and very tasty. 

Next, mix all of the "dry" ingredients together in a small Tupperware container. Yes, technically you could use a bowl. However, substituting a Tupperware container means you can just slap a lid on the leftovers without dirtying an extra dish.

Add the mayonnaise last, a little at a time, so you can control how much you have. I like my tuna salad well-coated in mayonnaise, but not swimming in it.

Finally, serve on your favorite gluten-free bread substitute. For the picture above, I made an open-faced sandwich on a toasted slice of Glutino's gluten-free flax seed bread (my favorite), but you could also try  gluten-free crackers, celery sticks, or rice cakes. Enjoy!

Why is it called "creative" gluten-free tuna salad?
Well, I threw together at the spur of the moment based on the ingredients I had on hand. I've tried craisins and sliced celery before, but the carrots were a bit of a (lucky) gamble.

How can it be adapted?
Truthfully, however you want. In the past, I have used halved grapes instead of craisins, and a friend and I once tried corn kernels, cooked rice (chilled), and ranch dressing--but I wouldn't recommend the latter combination. Throwing in sliced almonds or chopped walnuts would be another great way to change it up, as would using canned chicken or salmon instead of tuna.

Get creative, and let me know how it turns out!

This kitchen (mis)adventure was a delicious experiment gone right!


P.S.
I apologize for the lack of photos. I know the recipe is painfully easy, but we all want a little eye-candy, right? Basically, I was too hungry to bother with pictures--which is why the solo piece of photographic evidence features a half-eaten open-faced sandwich on gluten-free bread.


Tuesday, March 19, 2013

GoPicnic Ready-to-Eat Meals


GoPicnic Ready-to-Eat Meals
think of them as the gluten-free answer to Lunchables

On a recent trip to CostCo, My husband and I were dawdling in the snack aisle, and I noticed a stack of these GoPicnic lunches. "Ready-to-eat? Shelf-stable? Wouldn't it be amazing if they were gluten-free as well?" I thought to myself. As I headed over to investigate, my husband pointed out the gluten-free label on the side of the box--I couldn't believe my eyes or my luck, and I knew then and there I would soon be blogging about this product.

What are they?
For about $10, you get a box containing 4 ready-to-eat meals--2 each of 2 varieties. The Hummus & Crackers lunches contain hummus dip, crackers, a fruit and nut mix, a seed mix, and a small piece of dark chocolate with sea salt. The Turkey Stick & Crunch lunches (which I seem to prefer) contain a turkey snack stick (similar to a Slim Jim, but better), barbeque Popchips, a seed and fruit mix, peel-a-part fruit, and a small piece of dark chocolate with rice crisps. Everything in the lunches is individually wrapped and free of gluten, high fructose corn syrup, trans fats, and added MSG. (Note: One fruit and nut mix includes peanuts.) As an added bonus, each lunch comes in its own small, cardboard box about the size of a good paperback, so they're highly portable.


Why do I care?
If your experience has been anything like mine, you probably recognize how amazing it is to have a cheap, portable, and complete gluten-free meal. At $2.50 a pop, these totally fit the bill.

Here is how I where I have utilized (and enjoyed) them so far:
  1. Quick, portable lunch for a crazy day at work High-stakes testing days are nightmares for educators like myself, so my friend and I took our lunches to a nearby hiking trail for some much-needed stress relief. My GoPicnic lunch was the perfect option for dining al fresco.
  2. A charitable lunch for two A week or two ago my friend Nicole and I decided to spend a few hours reorganizing the toy cupboards at our church (trust me, they needed it). I knew we would be at it for a while, so I brought two GoPicnic lunches, some fruit, and two water bottles. After a few hours of work, we had an impromptu picnic on the floor of our nursery classroom, and then got back to it.
  3. Road-trip insurance policy After 8 years of marriage, my husband finally managed to drag me into the wilderness to go camping. I initially brought several GoPicnic lunches for a back-up to campfire-cooking, and, although dinner went splendidly, I happily busted into a Hummus & Crackers lunch on the ride home. Mobile dining, anyone?
  4. Sure beats the mystery of a hospital cafeteria Yesterday, my husband and I spent the day at the hospital with my darling son, Brannon. Although he went in for a minor procedure, a scheduling delay lead to hours of waiting. By the time they took back to the surgery suite, I was exhausted, anxious, and ready for some easy-to-eat comfort food--enter GoPicnic Turkey Stick & Crunch! Man, I love these things.
Do they taste good? 
Yes, they taste good--whether you have celiac disease or not. I am personally delighted with them (obviously) but both Stephanie (anonymous friend mentioned in #1) and Nicole can attest to the deliciousness of these meals. Better yet, they leave you feeling satisified but not weighed down. Steph even plans to buy some to take hiking (she's very active and healthy that way). 

Are they nutritious?
I think they're pretty nutritious, too, but you can decide for yourself:
  • Turkey Stick & Crunch Ready-to-Eat Meal: 300 calories, 8 grams of protein, 3 grams (more nutritional info-scroll to the bottom)
  • Hummus & Crackers: 380 calories, 19 grams of protein (not a typo--19), 7 grams of fiber (more nutritional info-scroll to the bottom)
Where can I buy them?
I bought them in a pack of four (2 of each variety) at CostCo for about $10, which makes each lunch about $2.50. However, I couldn't find any information or links to the product on Costco website, so you'll need to check with your local store.

If there are no CostCo's nearby or your store doesn't carry it, check out the manufacturer's website, gopicnic.com. The prices are rather higher, but it offers a wide-variety of read-to-eat meals, including both gluten-containing and gluten-free options. Before you order, double-check that the items you're purchasing are gluten-free options.

Another option is using GoPicnic's store locator. Simply type in your zipcode, and the store locator will give you a list of stores nearby which sell GoPicnic products. Apparently, they are available in some Targets and in many airport gift shops!

If you find this product anywhere else--in-store or online--please post a comment and let us know!

Where would you take your GoPicnic lunch?
Share your answer in the comments area.

Wednesday, March 6, 2013

Gluten-Free Cake-Mix Cookies


original recipe source

Gluten-Free Cake-Mix Cookies
makes approximately 2 1/2 dozen cookies

My crafty friend, Desiree, shared this wonderful recipe on her blog, Your Crafty Friend. The ingredients include 1 box of cake mix, 2 eggs, 1/2 cup of vegetable oil, and a small amount of sugar. Using just those four ingredients you can make up to three dozen cookies! I decided to be brave and tried the recipe using a gluten-free cake mix. It was a rousing success!

Ready to try it yourself? Make sure you follow the directions below, not the directions on the cake-mix box!

Start by collecting your ingredients:
  1. 1 box of gluten-free cake mix (I used Betty Crocker Devil's Food Cake Mix, Gluten-Free)
  2. 2 eggs
  3. 1/2 cup vegetable oil
  4. sugar to roll the cookies in (Desiree@YourCraftyFriend suggests about 1/4 cup)
(pint-size sous chef optional)

Next, combine the cake mix, eggs, and oil in a large mixing bowl. Stir thoroughly until all ingredients are combined. At this point, start preheating your oven to 350 degrees.


(make sure your sous chef doesn't get distracted)

At this point, my dough resembled very dark, gritty, wet soil.

For the next step, you will need a small bowl of sugar and one or two greased cookie sheets. Now, roll the dough into one-inch balls. For the gluten-free mix, you will probably need to "pat" it into shape more than roll it. Also, if the dough seems hard to work with, you may want to chill it in the refrigerator for a few minutes. Roll each ball in sugar and place it on a greased cookie sheet. Space the cookies about two inches apart.

Finally, bake the cookies at 350 degrees for 8-10 minutes or until the center is firm. As Desiree explains on her blog, the cookies will probably look a little puffy when they first come out, but they will settle as they cool.

Ding! The sound of success!

Make sure you let the cookies cool completely before you gobble them up. Gluten-free baked-goods tend to be crumbly, so letting them cool first can make a big difference.

(waiting is the hardest part) 


At last--time to dig in and enjoy!

This kitchen (mis)adventure was a definite success!


Feeling adventurous? Try the recipe and let me know how it goes.

Ready to experiment? Desiree recommends different combinations, such as rolling the cookies in chopped-up Andes mints instead of sugar. What creative combinations can you come up with? Share your ideas here or on Desiree's original recipe post.

P.S.

I am linking to Gluten-Free Fridays hosted by Vegetarian Mama. Pop on over and check it out!