Friday, May 31, 2013

Are you bugged by your gluten-free limitations?

I was out to dinner with my large family of in-laws, and my father-in-law calls across the table, "Hey, Lisa, I found an article you might be interested in." This is the link he shows me on his smart phone:


National Geographic: Daily News
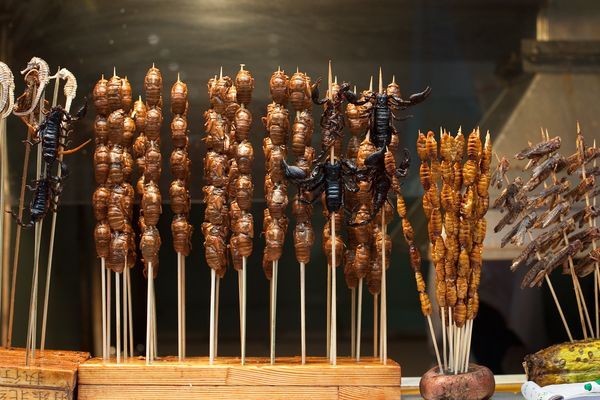
Cicada Recipes: Bugs Are Low-Carb, Gluten-Free Food
Blanched, boiled, or candied, cicadas are a healthy snack, experts say.

Umm...thank you?

Obviously, my father-in-law was joking (he does that a lot), but I am wondering why National Geographic--a credible magazine if there ever was one--chose to take this particular approach to the article. I mean, do they think celiacs everywhere have been saying to themselves, "You know, I really want to try cicadas, but I just don't know if they are gluten-free?" Curious, indeed.

On the flip side, I guess it always feels good to add another gluten-free snack to your list of options...right?

Sunday, May 26, 2013

Two-Ingredient Gluten-Free Tacos


Two-Ingredient Gluten-Free Tacos
tacos from a jar & tips on using corn tortillas

Tacos have been a staple of mine for a long time, but until recently I relied on McCormick's taco seasoning to make them. Although the mix isn't labeled gluten-free, the ingredients list seems safe, and it is much more convenient than trying to follow a taco recipe from scratch. It wasn't perfect, but it worked for us.

Since I started this blog, however, I have started paying more attention to what I eat and what I can do to improve it. I have noticed that I enjoy meals best when they include a "healthy" aspect, such as additional fruits and vegetables, and when I do something to make them my own, even if it is a simple as adding fresh tomatoes to a jar of store-bought pasta sauce. As I considered how I could improve our taco routine, I knew I needed to find a way to a) use a labeled gluten-free mix and b) add vegetables without a lot of work. 

My solution? I substituted a jar of gluten-free salsa in place of taco seasoning!

The ingredients:
  • 1 small jar of gluten-free salsa*
  • approximately 1 pound of ground beef
  • gluten-free corn tortillas or taco shells**
  • your choice of toppings
* Pace and La Victoria are both good options, but any gluten-free salsa will work.
**Mission corn products are labeled gluten-free and produced on dedicated lines. La Banderita corn tortillas are also labeled gluten-free.

The instructions:

Brown the ground beef in a large frying pan on medium to medium-high heat. If you are like me and hate clumpy taco filling, keep breaking up the meat to make sure it is nice and fine.


When the meat is thoroughly cooked and no pink remains, drain the fat and reduce the heat low or medium-low.

Slowly add salsa until all of the meat is well-coated, stirring as you go. I used about half of a standard-size jar, but I recommend adding a little at a time to make sure you don't overdo it...and wind up with soup.


Continue cooking and stirring until all of the liquid is absorbed. I forgot to time it (sorry!), but this should take about five to ten minutes.


Spoon into gluten-free tortillas or taco shells, top with your favorite toppings, and enjoy!


A few final caveats and notes:
  1. I will be honest. My husband said the first go-round tasted kind of ketchup-ey (I used Pace mild salsa), so next time I will kick it up a notch and try medium salsa or a different brand.
  2. Feel free to be creative. If you like spicier tacos, use medium or hot salsa, or add chili powder, crushed red pepper, or a can of diced green chilies. If you like fresh vegetables, throw in diced tomatoes, onions, or bell peppers.
  3. Sorry if my instructions aren't very specific. I am not an experienced chef, and I prefer the try-it-and-see approach. I figure if I can make it, anyone who is allowed to operate a stove probably can too.
And some advice regarding soft corn tortillas:

If you have ever shied away from soft corn tortillas before, I am going to guess it is because they crumble and break as you try to eat them. Good news! You can alleviate that problem by warming the tortillas (a painfully simple trick I learn from my uncle in-law).

I prefer to steam them in the steamer basket that came with my pots and pans set because it has the best result, but you could also warm them in a skillet or frying pan or nuke them in the microwave. Whichever way you choose, warming your corn tortillas will render them much more soft, supple, and tasty!

  • Using a steamer basket Start boiling water in the appropriate pot after you drain the fat from the meat--an inch or two deep is plenty. Covering the basket with a lid will help the water boil faster, but it is not necessary. When the water is boiling, place the tortillas in the basket, one tortilla at a time. Cover the basket with a lid, and let the tortilla steam for 5-10 seconds. Remove the tortilla with tongs--it will be hot! NOTE: If you steam them too long, they will turn mushy and fall apart.
  • Using a skillet or frying pan If you go this route, make sure you use very low heat or maybe a non-stick pan if you need one. Heating an empty non-stick pan can damage the coating, so make sure the tortilla is in the pan before you turn it on. Heat the tortilla until it is warm to the touch.
  • Using the microwave Warming tortillas in the microwave is my second favorite option because it is quick, available at work, and still results in (more or less) steamed tortillas. If you are using the microwave, your best option is to spread the tortillas on a microwave-safe plate (warm tortillas tend to stick together), place a coffee mug full of water in the corner, and microwave the tortillas for about 10 seconds. If that is not long enough, heat them again for about 5 seconds, repeating until they are the desired warmth (again, they get mushy if they are heated for too long). Alternatively, you could place the tortillas between wet paper towels before microwaving them, again for about 10 seconds.


Monday, May 6, 2013

Work it, girl!

My first outfit as a contributor to Work Your Wardrobe was posted today. Check it out if you get a chance:

A Tasty Gluten-Free Duo


A Tasty Gluten-Free Duo
Holy Yum Chicken & Garlic Lemon Green Beans

The two recipes I road-tested this week come to you courtesy of Pinterest. Well, that's where I found them anyhow. Technically, I guess, they come courtesy of the lovely ladies at Table For Two (Holy Yum Chicken) and She Wears Many Hats (Garlic Lemon Green Beans). Since Julie and Amy did such a great job writing the recipes, you will want to pop over to their blogs for the full instructions.

Notes on Holy Yum Chicken

When I first read this recipe, I knew my husband would love it. He is a big fan of chicken in all its forms, and loves anything with a good sauce. I, however, am a little pickier--at least when it comes to chicken. In my opinion, chicken is only as good as the sauce it is in. In this case, that means chicken is very, very good.


Ingredients:
  • boneless, skinless, chicken thighs
  • Dijon mustard*
  • 100% pure maple syrup
  • rice wine vinegar
  • salt
  • ground black pepper
  • cornstarch
  • fresh rosemary for garnish**
*See note below--I couldn't find gluten-free Dijon mustard
**Optional

If you want to try it out, here are some things to keep in mind:
  1. Read the entire recipe before you get started, including the disclaimers. Julie gives some pretty good advice, and she explains herself well.
  2. Try as I might, I could not find any gluten-free dijon mustard. Instead, I substituted a combination of Koop's brand Honey Mustard and Spicy Brown Mustard--both of which are available at Target and at least one Dollar Tree location. I used 1/4 cup of each, but you could play with the ratio based on your preferences. (Personally, I love honey mustard, but I think my husband would have preferred a bit more spice.)
  3. The recipe instructs you to use cornstarch to thicken the sauce--make sure you don't use too much. My sauce was thickening much, so I kept adding more and more and wound up with a gritty texture. In the future, I plan to stick to the recommended amount of cornstarch and live with a thinner consistency.
  4. Trimming the fat adds considerable time to your prep work--especially if your knife is dull. Plan for at least 10-15 additional minutes unless you trim it in advance.


Notes on Garlic Lemon Green Beans


My mother is, what I consider, a gourmet cook, which means she has high standards. Specifically, she thinks vegetables should be fresh, or at the very least, frozen--never canned. While I think this is a great attitude to have, it also intimidates the heck out of me. I mean, how does one even prepare, for example, fresh asparagus?

To try to overcome this fear of mine, I pinned this recipe, planning to finally show vegetables whose boss. Apparently, it's them. While the green beans I produced were edible, they were rather crunchy and bland. Now don't get me wrong--I still think the recipe is great. Proof of this is the fact that they were soft and flavorful the next day when I nuked them in the microwave. However, what I am saying, is that I need to take a couple more whacks at this before I can rock this recipe to it's fullest potential. If you have a little more experience in the kitchen, I am sure you will do fine.


Ingredients:
  • fresh green beans, cleaned and trimmed
  • olive oil
  • butter, salted*
  • fresh lemon juice**
  • garlic powder
  • salt
  • ground black pepper

*I am lactose-intolerant as well, so I substituted margarine
**I substituted lemon juice in a bottle (cringe if you must--it was already in the fridge)

Here are some things I may change on the next go-round:
  1. Use steamed frozen green beans instead of fresh The process of parboiling green beans seems simple, but I evidently didn't do it correctly. They way I figure it, I could probably defrost a bag of frozen green beans, dump it in to my steamer basket, and save myself some time and stress.
  2. Thoroughly cook and drain the green beans before adding the butter, lemon juice, etc. As I mentioned, my green beans turned out a little bland. My theory? All of the seasoning and flavor got left behind in the pan (which smelled delightful, by the way). Adding the final ingredients once the green beans have been drained and plated up should help make sure those tasty flavors will stay where they are supposed to be--on the green beans!
  3. Test the green beans to make sure they're done Yes, I know how obvious this seems. But this is exactly the kind of stuff a non-chef like me forgets to do. You live, and you learn.

Looking for more great recipe ideas?
Follow my Pinterest gluten-free recipe board, Kitchen (Mis)Adventures To-Be

Saturday, May 4, 2013

Have your cake, and eat it, too!


Let them eat cake!

I have been wanting to write this post for a few weeks now, and tonight I am finally getting around to it. 

Earlier this month, I turned the big 3-0. Partly because I am vain and partly because I think that it is a legitimate milestone, I was determined to do something to mark the occasion. Although I fussed over many different ideas and party themes from roughly November to March, I finally decided to keep it simple: close family and friends, pizza, salad and dessert. 

Of course, I ordered a gluten-free pizza for myself, but I was still indecisive about dessert. How could I possibly get away with serving people gluten-free birthday cake? At the same time, how could I deny myself such a quintessential part of the birthday-girl experience? Like I said, I'm vain. In the end, I decided I would have my gluten-free birthday cake, just like I wanted, but I would supply root beer floats and a more traditional dessert baked by my gracious and talented friend Stephanie for my guests. It seemed like a good plan and an easy way to appease everyone.

Was I wrong? Not exactly.

The thing is, everybody loves birthday cake--gluten-free or not. Although I warned all of my guests that the cake was gluten-free, everyone had a piece, and no one complained. In fact, I think they actually liked it, although it was different in texture and consistency than they are accustomed to. Cake is cake, right? On top of that, no one even took me up on the offer of root beer floats, and Stephanie took home her dessert untouched (she has a large extended family, so she didn't mind). Maybe they ate the cake because they were curious. Maybe they ate it because they were being polite. Or maybe Betty Crocker's Gluten-Free Yellow Cake Mix doesn't really taste so far different from the original version I remember from my youth. Bottom line--A cake I thought might turn out to be a disaster for me was actually as much of a success among my guests as any gluten-containing store-bought concoction would have been. 

At some point during the day--probably around the time I was looking at three or four untouched gallons of vanilla ice cream in my freezer--I realized that it was time for me to stop doing what I thought would make other people happy and start doing what makes me happy. In the end, they often work out to be the same thing--at least when you are dealing with people who love you.

It's my party, and I'll {have a double-layer gluten-free birthday cake with sprinkles on top} if I want to

Once I knew I was going to have my own Lisa-friendly, gluten-free, birthday cake, I also knew I needed to pull out all of the stops to make it as cute as possible. For me, that meant a double-layer cake with lots of frosting and cute embellishments displayed on one of my three sparkling cake stands. Although I was a little nervous about taking on a double-layer, gluten-free cake, I did it anyway.

The end result? I am very glad I did.

Initially, I was convinced the gluten-free cake would fall apart or be too crumbly to layer effectively. In fact, it was the exact opposite. The cake held together beautifully, and Stephanie said it was easier to frost than a gluten-containing cake because there were so few crumbs. At one point, we even picked up one of the two cake layers by hand and set it aside (I forgot to spread frosting between the layers). Can you even imagine doing that with a traditional cake? It would fall apart as soon as look at you.

Although I don't plan on baking another cake soon, I would definitely try the gluten-free, double-layer option again.


P.S.

If you're curious, I used two boxes of Betty Crocker's Gluten-Free Yellow Cake Mix (just follow the directions on the box), one container of Betty Crocker's Whipped Vanilla Frosting (next time I would buy two--all of their frosting is labeled gluten-free), and two 9x9 square backing pans to bake this cake. The sprinkles were not labeled gluten-free, but they seemed safe as they had no gluten-containing ingredients.